
1969 Dodge Daytona “Project Angrier”
By Mike Musto and Todd Ford
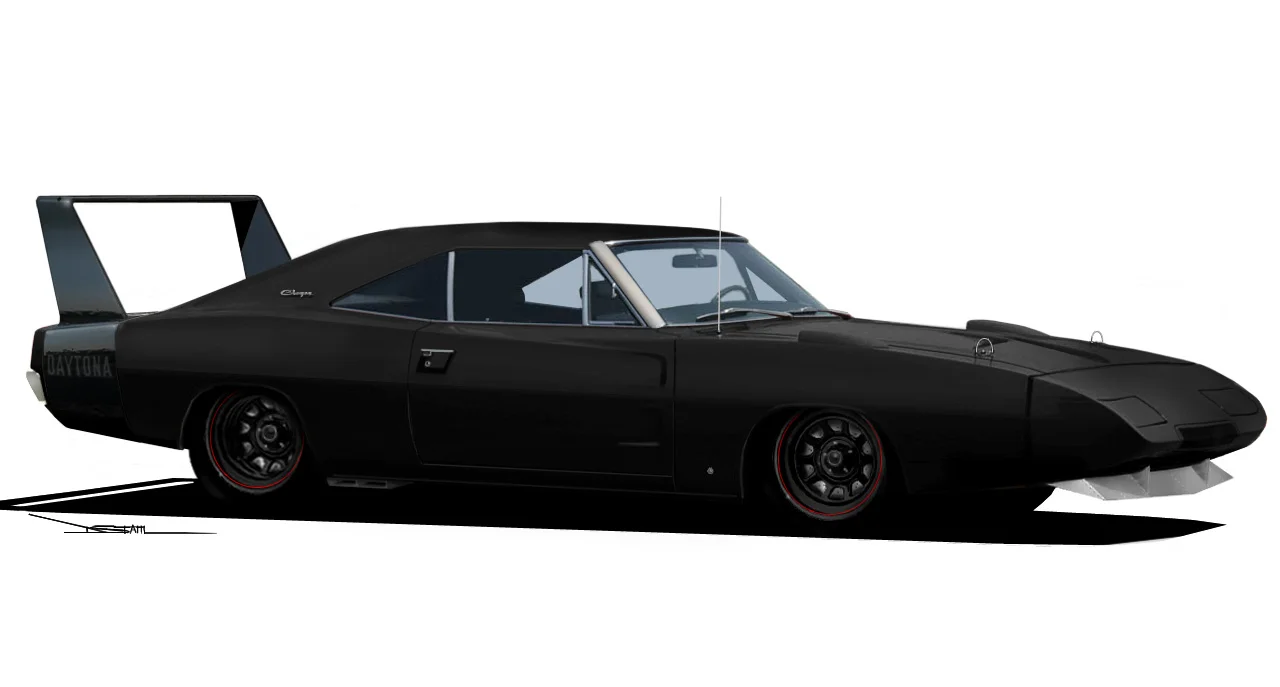
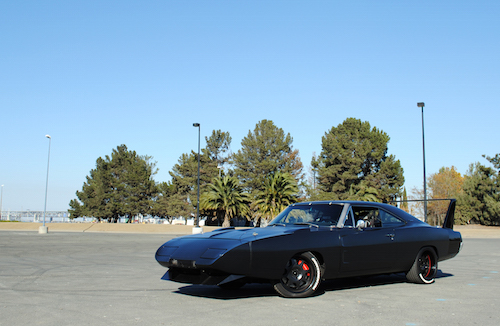
Now, to build anything, whether it be a toaster or a car, you need first to visualize what it is you are looking for. I wanted to build the meanest looking Dodge Daytona that ever rolled on God's green earth, so the first thing to do was have some renderings done. We went through about six to eight different renditions of the Daytona before settling on this one. The car was to look completely murdered out with flat black paint, a gloss wing, and added speed touches to boot.
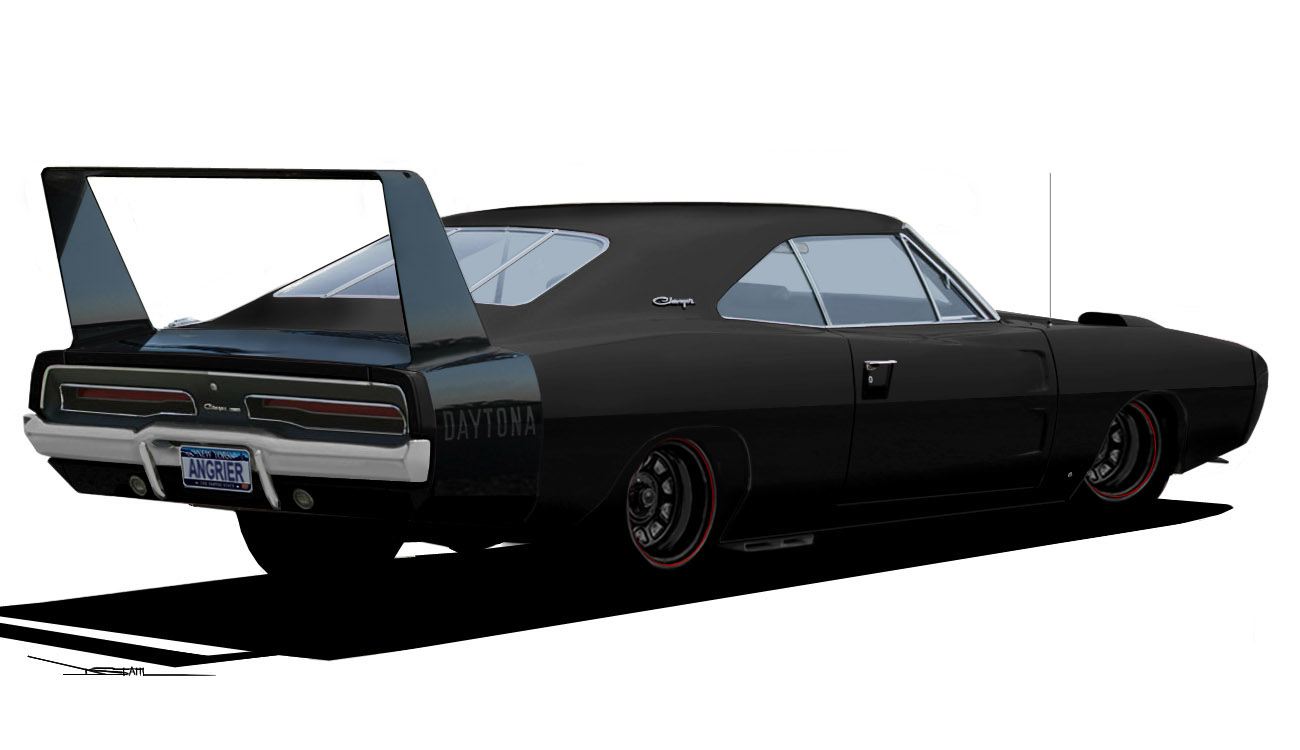
Building a car is like anything else... if you're going to do it, you do it right. That meant finding a clean donor car which was sourced from a seller in Indiana. It was in good shape, but the previous restoration was tired and thus it turned out to be the perfect candidate. Work began immediately on ripping down the car. Now, keep in mind that building a Daytona is no easy task. First off, you have to source the right parts, mainly the correct nose cone 1970 Charger front fenders and hood, the rear window plug and last but not least the king schwing wing!
Now I turned back to the Charger itself to begin the dismantling process. That started with the purchase of a cheap work van. Why you ask? You're going to need it 'cause when you start taking any '68-'70 Charger apart, you'll find that EVERY part is at least six feet long. Seriously, these are BIG cars with BIG parts that take up BIG space. Do this and life will be exponentially easier. Oh yea... make sure you also buy a few boxes of zip lock bags and a good sharpie maker. LABEL EVERYTHING!!!! I can't stress how important this is because a loss of even one part on these cars can make the reassembly process a living hell.
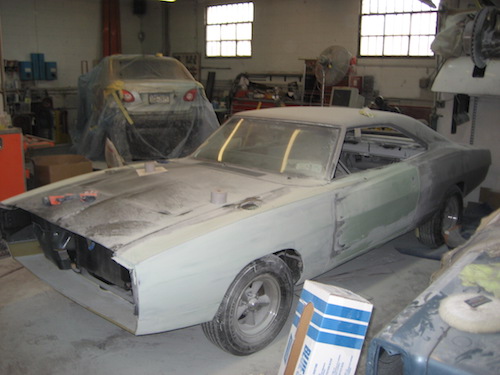
Once the body work began it was my job to source the 1970 fenders and hood and man, what a bitch this was.
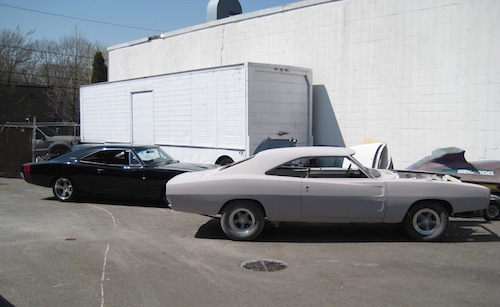
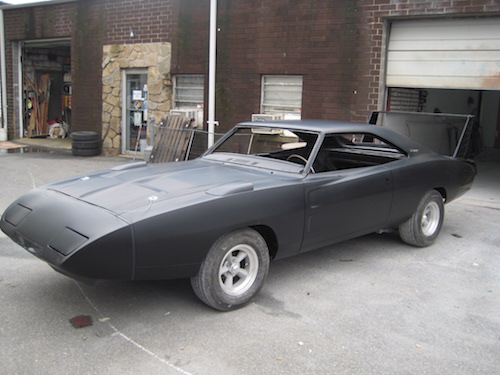
Ok, I am going to skip A LOT of steps here due to time constraints on my part, but I promise I will put them in later. As for right now, just take a look at the pics and you'll get the idea of what needs to happen. Also keep in mind the cost of a project like this. It is expensive... like over SIX FIGURES expensive... WAY OVER SIX FIGURES!!
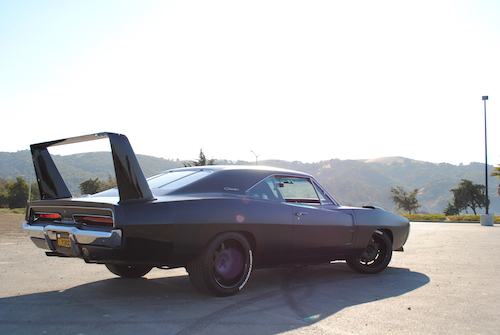

WHEELS / TIRES:
Custom one off NASCAR inspired wheels; 18x9 Front / 18x10 Tires: Front: 265/40/18 Rear: 285/40/18
INTERIOR:
- Sparco Milano II seats with full 6-way adjustability and lumbar support
- Sparco nascar wheel 15”
GAUGES:
Stock gauges redone: Silver face with Red Needles. 200 mph Speedometer, tic-toc-tac, oil pressure, oil temperature on a-pillar, fuel, and volt-meter. All gauges redone with VDO internals
LIGHTING:
Xenon headlight conversion with separate individual ballasts and relay for each light. Inner lights are amber conversion
DIMENSIONS AND CAPACITIES:
Length: 18 ½ feet
Wheelbase: 117”
Overall Width: 76.6”
Overall Height: 53”
Weight: 4000 lbs.
Fuel Tank: 19 gallons
Oil Capacity w/ Accusump: 8.5 quart
Mileage: 6 City / 13 Hwy
MODEL:
1969 Dodge Daytona: “PROJECT ANGRIER”
ENGINE:
Current Bore: 471 cui in, Current Stroke: 3.915”
Compression: 10.7:1
Intake Manifold: Holley Street Dominator (port matched)
Carburetor: Holley 850 Double Pumper
Oil: Moroso Accusump 3 quart accumulator w/electric valve
Climate Control: Factory A/C with new sanden compressor
Exhaust: TTi 1 7/8” headers ceramic coated, 3” X-pipe exhaust w/Dynomax SuperTurbo mufflers
TRANSMISSION:
Type: Keisler/Tremec TKO-600 5-speed
Rear: 8 ¾ Rear – 489 case, 3.55s / Detroit Tru-trac limited slip differential
SUSPENSION:
- Firm Feel Stage III Power Steering box, Firm Feel tubular upper control arms, FirmFeel 1 1/4” Hallow front Sway Bar
- Hellwig 1 1/8” rear sway bar
- Edelbrock IAS Performer shocks
- Reinforced Chassis
BRAKES:
- 2008 Front: Dodge Challenger SRT8 14” Rotor w/ 2008 Viper Calipers. Rear: 13” SRT8 rotors w/ ’98 Mustang PBR rear Caliper.
- Hawk HPS brake pads with Motul RBF-600 fluid/all lines steel braided
- Hydroboost Hydraulic Brake Assist